Hey Friends!
Today we are talking all about getting a good tan artificially. Before we get into how I like to fake tan, new products I’ve been loving and my tricks… I want to mention that all skin types no matter how pigmented or non-pigmented they are, are all beautiful. I personally love being tan and am able to get to a golden color naturally however now that I’m getting older (I’m still not old I know I know) I’m a lot more conscious of what I do to my skin and how I treat it. This is where fake tan comes in! I do also still enjoy hanging out in the sun on occasion. Whenever I do, I always make sure to wear sunscreen (especially on my face). My favourite brand of sunscreen is the Neutrogena hydroboost for my face as it is hydrating and doesn’t clog my pores.
So now lets get into fake tanning for all of you who can’t tan naturally, don’t have the time or want to be skin conscious.
My experience: I have been fake tanning for a few years now and have learned a lot along the way. I started with a jergens lotion that would leave me very orange and fake looking but that was back in high school and I thought I looked bomb… I still see people using this product and loving it… I prefer to use it as a tan booster but not on its own (I add it on top of my existing tan to enhance it slightly). I then got into spray tanning and love love love it. I learned all the ins and outs of how to properly take care & prep for fake tan. Although spray tanning is amazing and perfect for special occasions it can add up… that’s when I discovered fake tanning mousse. I used (& still use) a bronzing mousse that applies beautifully with a mitt however I know several people struggle with the mousse application so today we are going to be talking about 2 other methods that I have recently discovered and think would be perfect for fake tanning newbies. Also keep in mind your first application may not be perfect… it takes practice but be sure to take your time and & try your best to be precise.
Alright before we get into the how to use these products you need to PREP!
Preparation: Before fake tanning it is super important to follow to pre-tanning preparation in order to have the best possible application. This is something I do regardless of what type of tan I am applying.
Step 1: Shower, shave & exfoliate your entire body the day before (dead skin will take more of the pigment & leave you splotchy)
Step 2: Do not apply any deodorant, oils etc. on the day of the tan. Be sure those areas are clean so that it doesn’t impact the color.
Step 3: Be sure not to sweat between when you shower and before you fake tan.
Step 4: Lotion areas that are prone to absorbing more color (knees, elbows, side of feet, around the cuticles of your nails.) I also use a very small amount around my nose and chin as I find they absorb more color but this is more of a personal preference. The lotion will provide a slight barrier between the self-tanner/fake tan and your skin so be sure to rub it in extremely well.
Make sure you read all the instructions listed on the back of the products before beginning and remember these products take time to develop & can get on your clothes so have some dark/lose clothing to throw on after the tanning process is complete.
 Tanning Lotion($20): Lotion is soooo important for healthy glowy skin that’s why bronzing lotions are so popular! I have tried the oh so organic chocolate glaze (by Tan On The Run Niagara Falls) and it is the best bronzing lotion I’ve ever used. It does however require a lot of rubbing in… its not like your regular lotion that you can just slop on. It has bronzing sparkle in it to help you see the areas that have already been completed which is very helpful to ensure you get each and every area. If you want to try the tanning lotion, I recommend starting with a small area and really focusing on working the product in before moving the next to ensure a flawless finish. Oh and use gloves/brush or wash your hands between each section or they’ll go really dark.
Aerosol/ Spray tan yourself at home($45): (my fave) This is a new one that I received from my spray tan technician during quarantine and I love it!(check her out here) Application is extremely simple. You can select different shades depending on the level of tan you wish to achieve and the product is easily buildable!
Step 1: (Recommended) lay a dark towel down before getting started
Step 2: Spray the tan on your body from the can. Work in small sections to be sure it doesn’t dry up or soak in too fast (e.g. Lower leg, upper leg, stomach etc.)
Step 3: use a mitt/ brush to blend out any lines that appear after spraying each section.
Step 4: Follow all the aftercare instructions & wash off after the given time.
For hands, face and neck I recommend using a brush. First apply the tan onto a surface and then dip the brush into the product. Apply to those important areas using a light hand and circular motions to ensure a flawless application. (don’t forget behind your ear, neck and by your wrists)
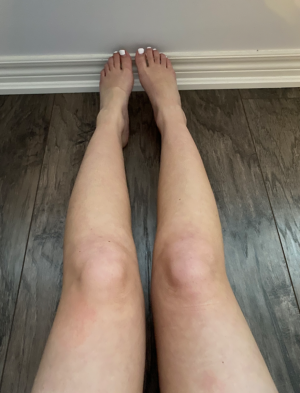
Before Tan
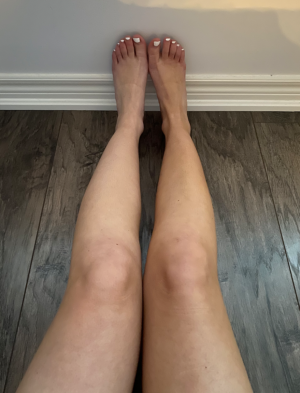
1 layer (right leg)
2 layers (right leg)

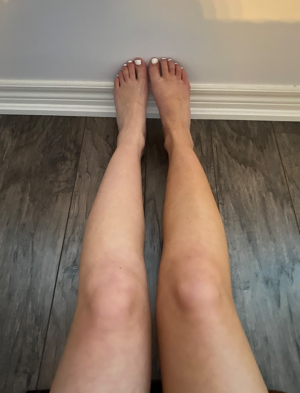
After Wash – Final Product 2 coats (both legs)
Spray Tans: This is another option that is great if you don’t think you’d be the best at fake tanning yourself. It gives a flawless look & professional application every time. This can also be done in the comfort of your home (depending on who you hire). I love the experience with Tan on the Run Niagara Falls & have always had amazing results. All the products they use are plant based so no chemicals or products that will irritate your skin.
All of these products listed today are non-pore clogging, organic formulated to be safe for everyone & are available through Tan on the run. This product is even safe during pregnancy which I have been loving. Having a tan makes me feel more confident and sometime in pregnancy we aren’t always the most confident, so this was definitely a big confidence booster. Again, all skin types are beautiful in every way possible, but this is what I enjoy and what makes me feel my best.
With any type of take tan application it is super important to keep your skin hydrated to ensure the tan doesn’t rub or flake off of in any dry areas. Hydrated skin is happy skin.
Here are my favourite face lotion & body lotion.
If I were to choose a favourite, I would say the Aerosol is soooo nice and I loved the application. Although I also enjoyed the lotion… my application wasn’t as great as the “Spray Tan Can”. The “Spray Tan Can” seemed to last a bit longer due to the thinner formula & is the most similar to a spray tan. It is also super buildable, so I was able to do a few applications to achieve my desired color.
Overall any form of fake tan is awesome & way better for your skin. Everyone’s experience is going to be different & they will enjoy certain products over others. I personally don’t think you can go wrong with any of the products I’ve listed above & they all can be used multiple times for the at home items. Worst case… your tan comes off it’s not permanent so don’t stress too much and take notes for the next application.
Happy Tanning.
Love Chels
